Raw Nut Mylk


Zemanta Related Posts Thumbnail

As a mostly full time, stay at home mom, the perks of making all of my own food seems endless.  I don’t just mean making breakfast, lunch, and dinner.  I’m talking about making my own ingredients.

I suppose before the new family addition, it was difficult to see how I would find the time to manifest doing anything.  And of course some days it still is (like this blog for example!)  But as Oliver’s duration of sleep at night gets a little longer, and the naps are plentiful, I am happily enjoying the time I have to stray away from the ‘processed’ food we were eating.

I’d like to think that my diet is as healthy as it can be.  I eat an entirely plant based diet, mostly organic, full of whole grains and legumes.  But there were a couple things hanging over my head that I knew could be eliminated.  For example, why was I not making my own almond milk?  I had already dived into making my own yogurt, and vegan-naise, so why still buy the processed nut milks?  Once my lovely vitamix came into my life, I had no excuse.

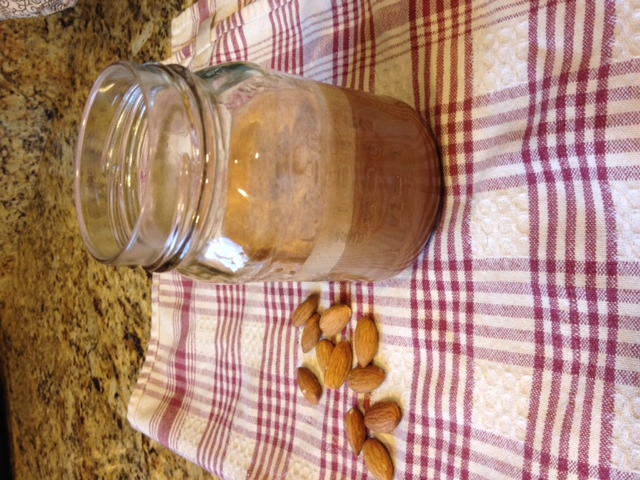
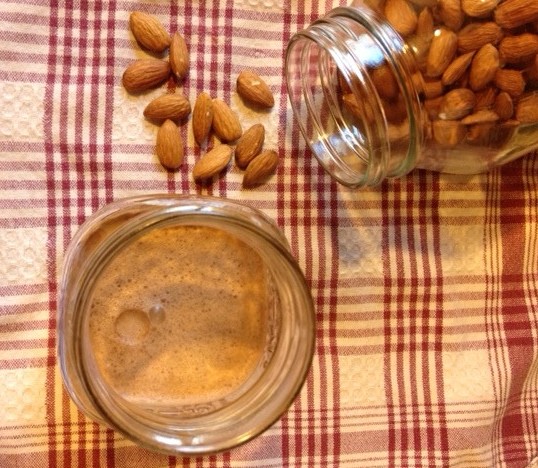
So here goes:  My raw almond mylk recipe (plain, chocolate, and strawberry versions as well!)

Raw Nut Mylk

Ingredients

  • 1 cup raw almonds, or any other nut
  • 4 cups cold filtered water
  • 1 Tbl. agave (optional)
  • pinch celtic salt
  • 1/2 tea. vanilla
  • To make chocolate or strawberry mylk, you will need 2-3 Tbl. raw cacao, or 4 frozen strawberries)

Instructions

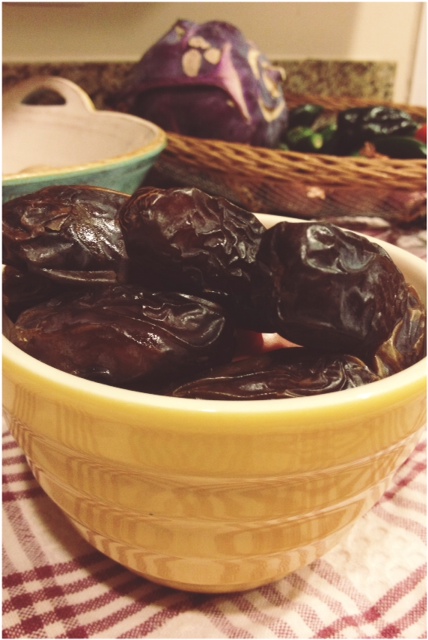
  1. Soak raw almonds in warm water with a pinch of salt for at least 6 hours.
  2. Drain water, then rinse.
  3. Place almonds and filtered water in blender. Turn on high for about 2 minutes.
  4. Using a nut milk bag, place bag over a large bowl or carafe. Pour in almond mylk.
  5. Gently twist the top of bag (so not to lose any!) and start to work out the liquid leaving behind the nut pulp.
  6. Return mylk back to the blender and add remaining ingredients (Add cacao or strawberries here.)
  7. Blend on low just to incorporate, unless you are adding in the frozen strawberies- then blend on high.
http://vegpod.com/raw-mylks/


Simple.  If you have a toddler hanging around, this is a terrific recipe to let them help.  Lailah, my 3 year old roommate, loves dancing and counting with me as we wait for the almonds to blend.  She also enjoys “milking” the almonds, and being the first to chug some  of the finished product, making sure we made it correctly.  So fun!

photo

You also don’t need to discard the pulp!  I keep it in a mason jar in the fridge and stir a couple spoonfuls into my steel cut oatmeal in the mornings.  Protein boost!

Long ago I gave up soy milk, and switched to only buying soy products that were free of GMO’s and organic.  But as of a week ago, I gave up soy.  As a tofu scramble loving vegan, it was a hard thing to do!  And I’ve started to realize how much soy plays the partner to corn.  Soy lecithin is such a sneaky ingredient! Next on my list will be attempts at a vegan butter.  I’m so thankful earth balance has a soy free butter.

photo 2

My pre babe DIY month

Zemanta Related Posts Thumbnail

My entire 10 months of awaiting Oliver was filled with random happenings.  Aside from working full time at Field to Fork and the farmers markets, we packed up our whole house, put 90% of our belongings in storage, and moved to the east coast.  Once we were settled in,I had about a month to dilly dally; and find another low key job that would allow me to stay off my feet, to ensure a healthy pregnancy.  After finding the two perfect jobs, I finally started to get my nesting on!

I feel as though I am a natural nester.  I love my home.  Since most of our belongings are still in storage I’ve had to turn our bedroom into my little nest.  Our space is pretty limited, but we make the most of it.

I knew we wanted to use cloth diapers from the start.  Now because I’d be washing a batch of dirty diapers every morning, why wouldn’t I use cloth wipes?  I first cut up a pair of old flannel pajama pants, then got some hand me down flannel fabric scraps.  After cutting up square after square, it was sew time!  Finished product:

20140104-114724.jpg

And voila!  Cute, soft on your bum, cloth wipes!  Here is a link to a tutorial.  And whats even better, is my homemade bum spray!  My solution is made up of Dr. Bronners unscented baby soap, sunflower oil, lavender, calendula, and camomile oils, along with a couple drops of grapefruit seed extract.

Erik and I recently drove back to Wisconsin for Christmas break.  On the road, we knew it would be hard to wash our diapers, so we used the Seventh Generation and Naty brand of disposables.  We also used an organic disposable wipe.  Oliver had a rash by day 2.  As soon as we arrived in WI we switched back to our Soft Bums and cloth wipes. The rash disappeared.
Side note:  Soft Bums are made in the USA.  Whoot whoot!

My next project stemed from realizing how much paper work comes with a baby!  I know we’ve always had papers that needed some organizing, so I decided to bring home a file cabinet from work and modge podge it. My roommate had this great copy of an extremely old dictionary, and that worked perfectly.

20140104-114738.jpg

It turned out awesome.  Nice and neutral, and so easy to do. I now feel super organized!  

The next thing I knew I had to make was a mobile.  At the start of fall we had been collecting numerous varieties of leaves.  The fall here felt like it only ended at the start of December so we had plenty of time to collect the best of the colors.  We dried and flattened them in books, then I laminated them.  My original plan was to hang the leaves from some roughed up looking sticks, but my roommate got me on this gods eye kick.  So I decided to make a massive Gods eye using 3 sticks, and then hang the leaves from there.

20140104-114758.jpg

Some of those leaves look pre-historic!

 I think it turned out awesome!  It does seem a little over the top, but as Oliver starts to see lines and patterns more clearly, he loves the reflection the laminate gives when it hits the sunlight from the window.  And I love the idea of us capturing the Autumn of his birth.  It was such a happy time for us!

The last project we accomplished was our onesies.  I am so proud of these onesies.  I also can’t stress how EASY they we to make.  I am still amazed I never thought to try this technique before.  I mean Freezer paper?!?  I’m not even sure I know how to use freezer paper for its intended purpose.  I now have all these crazy ideas for shirts, pillow cases, cloth napkins, a cool pair of high top chucks, you name it!  And just think of all the possible gift options!  Here is a link to the tutorial as well as the print out templates.  She also writes about bleaching techniques which I’ll have to try next.

20140104-114848.jpgMy little lotus.

The only sad thing, as I was warned of this, was how quick he’s grown out of them.  Erik and I still try to squeeze him into our favorites, but my how time is flying!  I sadly already have a box saved for future children, should there be any.

As for the projects I didn’t get to finish:  Cloth napkins and Cold pressed soap.  I purchased everything to make a camomile bar soap as Christmas presents, then discovered you have to let the soap sit for at least 4 weeks to allow excess water to drain.  I knew they wouldn’t be done in time, so I will have to shoot for Valentines presents.

When little Ollie arrived of course there was a million more things I wished I had gotten done.  But thats a thing of the past.  I’m now trying to teach myself to just allow things to go.  Who cares if I don’t sweep?  Who cares if the laundry sits there another day?  The only job I have right now is being a mom to this little nugget we brought into this crazy world.  And its the most important job I’ve ever had!


Escabeche (pickled jalepenos)

photo (13)I am hoping that this next recipe will make its way into your hearts and homes as a pantry staple.  It has reserved shelf space in ours.  It has been so nice to save our veggies throughout the winter by canning.  Wisconsin winters tend to be long, and there really is nothing quite like a summer tomato sauce in the brisk cold of February.  But for now we are not going to dive into pressure canning.  We are going to take a slight short cut and talk pickling!

This recipe is something Erik and I have made the last two summers, and it never fails to bring out the spice fanatic in our guests!  A slight warning: This is for those that can handle the spice.  And I mean really handle!  Lets talk Escabeche.

Escabeche simply means “pickled jalapenos.”   Once the peppers are ripe for the pickling, we like to take it one step further and add other fresh garden veggies that we can harvest around the same time such as yellow onions, cauliflower & carrots.  I’ve seen this prepared with julienned potatoes and even jicama before, but I haven’t ventured there….yet.

Escabeche (pickled jalepenos)

Ingredients

  • 1 lb jalapeño peppers
  • 1/3 cup olive oil
  • 2-3 medium white or yellow onions, thickly sliced
  • 2-3 medium carrots, peeled and thickly sliced
  • Florets from half a small cauliflower
  • 1 head garlic cloves, peeled
  • 2 cups apple cider vinegar
  • 2 cups distilled white vinegar
  • 2 Tbsp Kosher salt or sea salt
  • 2 bay leaves
  • 1/2 teaspoon dried oregano
  • 4 sprigs of fresh marjoram or 1/4 teaspoon dried
  • 4 sprigs of fresh thyme or 1/4 teaspoon dried
  • 1 Tbsp sugar

Instructions

  1. Wash the chilies, leaving the stems intact. Cut a cross in the tip end of each chile, and slice some in half. I like the looks of the open chili.
  2. Heat oil in a large, deep skillet. Add the chiles, onions, carrots, cauliflower if using, and garlic. Cook over medium heat for about 10 minutes, stirring to prevent burning.
  3. Add the vinegar, salt, herbs, and sugar and bring to a boil. Lower the heat and simmer for about 10.
  4. Pack into sterilized jars with the chiles and vegetables. I also like to make sure I have a sprig or bay leaf in every jar for decoration purpose. Top with the vinegar and seal.
  5. I like to let the jars sit on my pantry shelf for at least a month or two... I know what you're thinking. Ugh- the wait! But the best things are worth waiting for! Once you open the jar, it can keep for up to two months in the refrigerator.
  6. *On a side note, you may want to hot water bath the jars to give them a proper seal. I have never done this with some pickle recipes, but don't listen to me! Be safe, and do what feels right!
http://vegpod.com/escabeche-pickled-jalepenos/


afterlight

Escabeche, served as a side

Escabeche can be served along side any dish, best with Latin-influenced food.  Last night I made an amazing Autumnal Pozole.  I like to describe pozole as the Latin version of Pho. It is usually made with hominy, which was a sacred plant for the Aztecs.  The texture of maize, or hominy, is soft and chewy, and so wonderful in soups and stews.

afterlight (1)

Autumn Red Pozole

This pozole had butternut squash, black beans, tomatoes, and onion.  The real getter is how all the fresh veggies come into play.  Again, much like Pho, you can assemble it any way you’d like.  We ladled the stew over a warm piece of savory cornbread, then chose to top it off with fresh cabbage, cilantro, radish, lime juice, homemade tortillas strips, and a dollop of jalepeno relish Erik made.  It turned out amazing.

DIY Laundry Detergent

afterlight (1)I never in a million years would have thought l’d like to be the stay at home kind of girl.  But with the little vegan bun so close to arriving (!), I find myself ‘nesting’, with so many DIY projects on my list!

Becoming domestic is always something I’ve wanted to explore more.  Though its hard with the everyday work schedule.  Now with just one week of work left, I have time to dive in.  First on my list was making my own laundry detergent.  Wait, let me be honest;  first on my list, for years, has been to make my own dog food.  And that will come in time, as my excuse of now is needing more storage space.  So laundry detergent…. a totally simple-money saving task that would prove to be easy as pie to work into anyone’s lifestyle.  I have had a couple friends that have been doing this for so long, with far busier schedules than me, so I knew I had no excuse.  And along with the cloth diapers about to start rolling in daily, I knew this was the time.  Method adapted from Wellness Mama!

Materials / Ingredients

  • BoraxA natural laundry booster that lifts stains and odors from your clothes.  You can find this at just about any grocery store.  
  • Washing SodaA natural water softener and stain remover.  Also found in the detergent aisle at many grocery stores.
  • Bar SoapI prefer to use an all natural, less perfume-y style soap.  Dr. Bronners makes bar soaps, and if whole foods happens to have a sale going on- even better.
  • Container – You will need something to store the detergent in, preferably something that has a large opening, so you can easily use your scoop. 
  • Cheese GraterYour standard, handheld grater.
  • 1/4 cup scoop Any measuring cup will do!

Now to start:

In a large bowl, using cheese grater, shred the bar soap.  I use the medium sized teeth.  Once you have finished, mix in 2 cups borax, and 2 cups washing soda.  The proportions should be 1 cup bar soap, 2 cups borax, and 2 cups washing soda.  Gently stir together till fully incorporated.  Make sure you get to see little specs of your bar soap squiggles throughout the batch!  Transfer to your storing container.

And Voila!  You just made Laundry Detergent!
To use:  1/8 of a cup for smaller loads, and 1/4 cup for large loads.

Our first trial run just happened to be the day Erik brought all of his soccer clothes home.  And boy were they stinky!  The detergent proved to work!  I am still accessing my math on how mush this will save us, but I think it cuts the price in half (possibly more) of what we’d spend on liquid detergent.  Not to mention we cut back on contributing more to the plastic take over of the world.  This article was posted last week about plastic in our oceans, and the effects it has on whales, and various animals around the globe.

Gorman Farm, Laurel MD, & Community Supported Agriculture.

photo 1 (1)

As the growing season comes to yet another end, it always goes out with a bang!  My favorite time of year is always fall.  The weather, the fashion, and the veggies- oh the veggies!  I must say while I was living in San Diego, I felt cheated of how beautiful being immersed in fall was.  For this reason, I mostly planned my trips to venture back home to NY in Autumn.  Then I ended up in Germany, and then Wisconsin.  Wisconsin too was almost sort of a tease.  The colors change, you get all the great hearty cold weather cropped vegetables, and the before you know it-BAM- winter hits you in the face and you’ve only worn your favorite cardigan once.  As of now, being in Annapolis, I am adoring the weather.  Fall is still here (its November 8th) and it seems like it will stay for a bit.

Though with the end of fall, comes the end of CSA shares, and the last of the years’ crops.  Now I have a confession.  I have never held a CSA share.  Not once.  Yes it seems bizarre even to me.  I think its that I have been so lucky to have an amazing array of friends surround me, friends that love to garden and farm, thus the need was never there.  The last 3 years Erik and I grew so much of our own food, we started to feel as though we were running out of ideas to can and preserve.  We often found ourselves turning into our own CSA, dropping off bags of veggies we knew we couldn’t get too!

photo 2

For those who aren’t familiar with what exactly a CSA is, let me explain.  CSA stands for Community Supported Agriculture.  This basically means that you are supporting your farmer of choice to provide you with what is called a ‘share’ aka membership. The farmer rotates what they are able to provide you with, based on the season, and what they have available.  Sometimes this isn’t just limited to veggies.  Some farmers will have eggs, flowers, and possibly meat and cheeses.

photo 2

 Full Shares and half shares. The best thing about this farm is YOU get to pick out which head of lettuce, cabbage, etc you want.

There are SO many pros to this set up!  The first for me is knowing where your food has come from.  For our growing(!) family if I cant personally dig up some dirt- I want to know exactly how my vegetables are being grown, and what practices are being used.  Any local farmer should be happy to share this info with you.  The second biggest pro for me is the support of your local community.  I could rant on and on about my big business nonsense here- but I think you all know what I’m getting at.

So All these lovely pictures I took at Gorman Farm in Laurel MD.  Erik and I moved to Maryland too late to be an active CSA share holder, but twice our household has been lucky to have a friend leave town and give us her share!  A full share!  So awesome.  The farm really is beautiful, and it looks like all the staff seem to enjoy their everyday tasks.  Their mission: “To encourage an understanding of the connection between the food we eat, the life we live and the health of our community.”

photo 3

 I love all the cool weather greens!  And my favorite of all- the beets!

The other great thing about Gorman is the farm stand they have open three days a week to the public.  Anyone can shop directly out of the big barn and enjoy their local produce.  They also sell an assortment of local honey’s and pies.

photo 1 (1)

If anyone is interested in becoming part of a CSA next season,go to Local Harvest to find a farm in your area!  They may seem a little pricy at first, but if you are household that tends to cook a lot at home, especially a veggie household, then its right up your alley.  Plus, with farms like Gorman growing over 100 different varieties, you may learn how to cook with new vegetables you’ve never even seen before!  How exciting!

photo 3

 Happy Harvesting 🙂

Caramel Sea Salt Chocolate Cups

afterlight

Blame it on fall, but I am loving the dates surrounding me lately.  I often think figs are my favorite fruit.  Figs have such a great texture, and are not too sweet.  I used to love eating them fresh off the trees in San Diego.  They are just so beautifully unique.

As far as dates go, they taste like nature’s caramel.  Creamy, rich in dietary fiber, potassium, and Manganese (Manganese is good for your bones, anemia, and premenstrual  symptoms) dates can be used in so many different ways.  Smoothies, salads, oatmeal, savory dishes, brownies, or just as is.  I’ve been using them to sweeten my 2 minute hemp mylk…recipe to come soon.

photo (2)

Dates!  And yes, that is a huge Kohlrabi in the background!

There are endless varieties of dates grown in the Middle East, but from California the two most common are the Medjool and Deglet.  My roommates just brought back a bag of plump Medjool dates from this great little place called Sun and Earth.  I have yet to venture there, but they sell an assortment of bulk organic herbs, spices, and other random organic grocer products.  The dates they brought back are out of this world!  Its like they reached their peak of plumpness as they entered our kitchen, and hadn’t dried out too much where you’d want to re-hydrate them.  They are just perfect.

With all this date hype, I wanted to share a recipe I used for Erik’s birthday.  My husband doesn’t like cake, he’s not big on pie, so I opted to try for Caramel sea salted chocolate cups…. no biggie  🙂

Caramel Sea Salt Chocolate Cups

Ingredients

  • For the caramel filling:

  • 2 cups pitted dates, soaked for at least 2 hours. Save date water...see below 🙂
  • 1/4 cup soaked date water
  • 1.5 tsp vanilla extract
  • 1/2 tsp sea salt

  • For the chocolate:

  • 3/4 cup vegan chocolate chips
  • 1 Tbl almond milk
  • 1 tsp virgin coconut oil

Instructions

    For the Chocolate:
  1. Melt chocolate chips in a small heavy bottomed sauce pan.
  2. Stir in coconut oil, and almond milk. You may want to use a small whisk to help make sure the coconut oil is well mixed in.
  3. Line about 15 mini cups with melted chocolate, bottom layer!
  4. Place in fridge.
  5. For the Caramel:
  6. Drain soaked dates, but save the date water!
  7. Place all ingredients in a food processor. Blend until smooth, thick, and creamy. Using a spatula, scrape down the sides as necessary, making sure all gets incorporated.
  8. Set aside.
  9. To assemble:
  10. After bottom layer of chocolate has firmed up in fridge, layer with a caramel dollop, then top off with more melted chocolate mixture. Garnish with cacao nibs, and some course salt flakes.
  11. Place back into fridge to solidify. They should be ready to eat in 15 minutes.
http://vegpod.com/caramel-sea-salt-chocolate-cups/

Some side notes:
I was a little concerned that the melted chocolate wouldn’t surround the ‘caramel’, so I added more than I should have.  Not that I’m complaining, I mean ANY amount of chocolate is fine by me.  But because of this, they did turn out a tad rich.

I also ended up with some of the date-caramel sauce leftover, which was great to eat with fresh apple slices!  Or a spoon.  That stuff is amazing, and definitely a danger to have just lying around the kitchen.

photo 2

The first layer of chocolate goes in… did I mention that should you happen to make a mess, this is the best finger licking recipe to have that happen?!

photo 3

The caramel layer.  

afterlight

Happy 30th Erik!  This is definitely a big boy dessert!  Who needs cake anyway?!