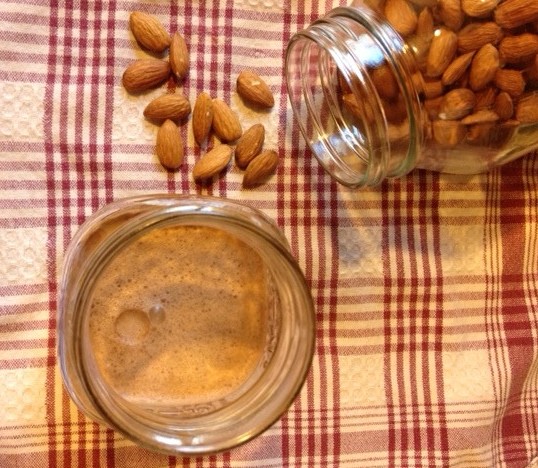
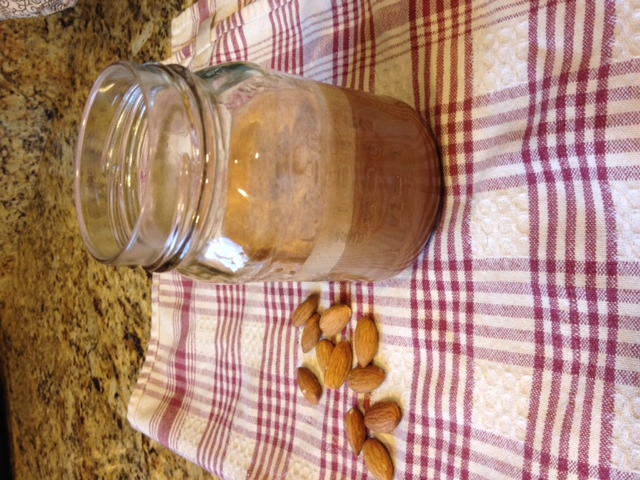
Turmeric Latte aka Golden Milk

img_0379-1024x1024

Psychedelic milk!

Turmeric root seems to be making a splash in the superfood world.  Most everyone is familiar with turmeric thanks to its use in the common spice blend, curry.  This bright yellow spice has tons of health benefits, such as anti-inflammatory properties which can reduce joint pain from osteoarthritis and Crohn’s Disease. It is also said to help reduce the risk of cancer- but really, most all superfoods these days live up to that challenge. Turmeric contains a naturally occurring chemical compound called curcumin.  Curcumin regulates messengers that cause inflammation in the body… wowza!  It also contains small amounts of iron, protein, and fiber.  Turmeric root can also be used to treat wounds, cuts, rashes, bruises, insect bites, and swelling

This Auryvedic recipe for Golden Milk traditionally incorporates black pepper to help absorption.   Drinking this before bed can aid relaxation and help to boost your immune system while sleeping.  For extra crunchy DIY points, use your own homemade almond milk!

Turmeric Latte aka Golden Milk

Ingredients

  • 1 cup almond milk
  • 1 Teaspoon maple syrup
  • 1/4 teaspoon ground turmeric
  • 1/4 teaspoon ground ginger
  • 1/8 teaspoon ground cinnamon
  • 1/8 teaspoon ground cardamom
  • 1/2 vanilla bean, seeds scraped (can substitute 1/2 teaspoon of extract)
  • pinch of freshly ground pepper
  • 1/2 teaspoon coconut oil
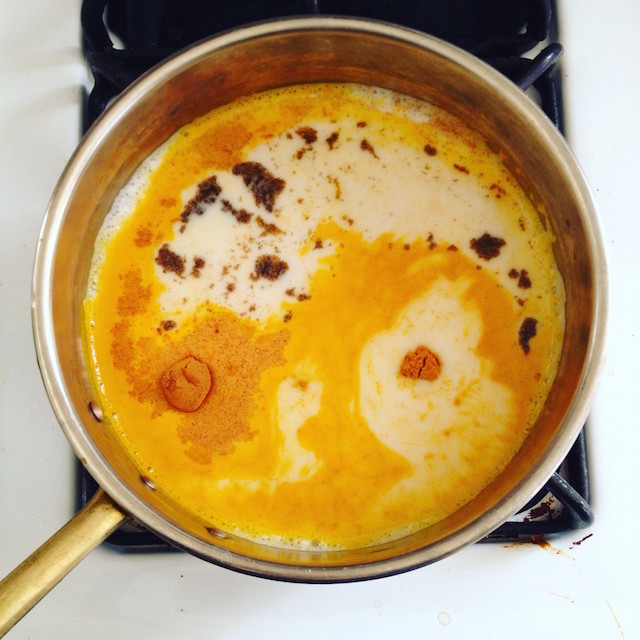
Instructions

  1. Over low heat, add all ingredients, except coconut oil, and whisk till combined.
  2. Bring to steaming, just below a simmer. Stir occasionally, for 10 minutes. DO NOT let it come to a boil!
  3. Remove from heat. Stir in coconut oil. Taste and add additional maple syrup if desired.
http://vegpod.com/turmeric-latte-aka-golden-milk/


img_0557

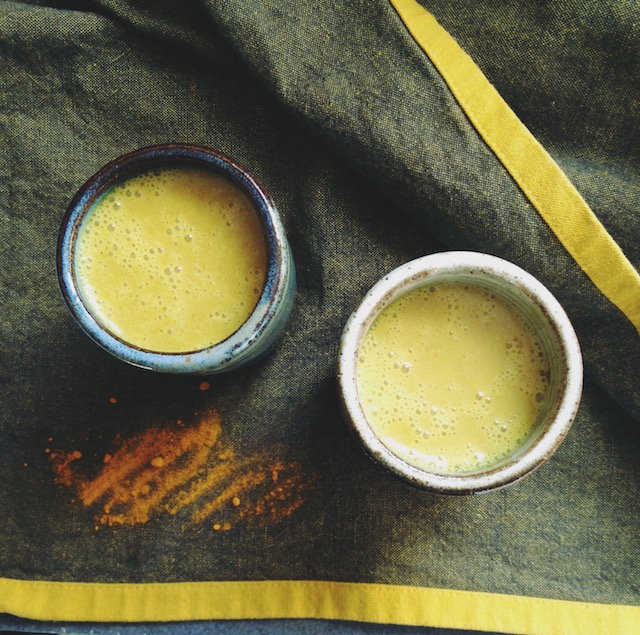
Shot out to my hubbies pottery skills.  I am loving these tumblers.

This recipe can be customized however you’d like!  Options are endless, but you get the idea.

Enjoy!

Chocolate Banana Chia Pudding with Coconut Whip

20140716-153651-56211861.jpg

Everything looks yummy in a mason jar. 

Forgive me for skipping out on my round up for June.  This summer has been going by altogether too fast.  More on that jazz later.  The biggest feature in our kitchen this summer has been the banana.  Because Oliver has developed a serious addiction to this mushy fruit, we have to keep a bunch on hand at all times.  This results in many of our dishes using bananas to keep from spoiling or overcrowding the freezer.

I’ve posted about the many benefits of chia seeds before, on this post, but until last week I had never made my own chia pudding.  I’ve seen recipes for it a dozen times, it always looked quick and easy, so why has this escaped me?  Not only is this recipe nutrient packed, but its sugar free, soy free, gluten free and pretty darn tasty.  The strange tapioca-like texture of the pudding pairs perfectly with the smooth coconut whip cream.  Both are sweetened just enough to not overwhelm your palate.

Chocolate Banana chia pudding with coconut whip

Ingredients

  • 2 cups unsweetened almond milk (or coconut)
  • 2 tablespoons chia seeds
  • 2 bananas
  • 3 medjool dates, pits removed
  • 3 tablespoons raw cacao powder
  • 2 teaspoons vanilla
  • Dash of sea salt

  • 1 can coconut milk (refrigerated overnight)
  • 1 tablespoon agave
  • 1 teaspoon vanilla bean extract
  • 1 tablespoon shredded coconut

  • Fresh banana slices, a sprinkle of cinnamon, and some chocolate chips for garnish (optional)

Instructions

  1. Place almond milk, chia seeds, bananas, dates, raw cacao, vanilla and salt in blender and blend till all ingredients are smooth.
  2. Place in covered container in refrigerator for at least 4 hours.
  3. Meanwhile make the coconut whipped cream. Open the can of coconut milk carefully. scoop out the top layer of cream, while reserving the leftover coconut water for another recipe (smoothie perhaps). Place in bowl and add agave, vanilla, and shredded coconut. Whisk by hand or with hand mixer till fluffy. (Do not over whisk, or you will have soupy whip)
  4. After becoming super impatient, find some serving glasses or jars.
  5. Stack as a trifle alternating the chia pudding/coconut whip as desired. You can also just dollop some of the whip as you like.
  6. Garnish with fresh banana slices, chocolate chips, and a sprinkle of cinnamon.
http://vegpod.com/chocolate-banana-chia-pudding-with-coconut-whip/


20140716-145255-53575908.jpg


Chia is also loaded with fiber, making this pudding also makes a great breakfast.  It is also so creamy that it satisfies any desire for dairy.  Im thinking ground up chia seeds may be the perfect binder for a raw banana cream pie.  Enjoy!


20140702-233953-85193480

 Oliver gettin down with his banana filled mesh feeder at the Riverwest Co op

Sheboygan’s Culinary Car

20140717-104519-38719826.jpg

JMKAC’s Culinary Car.

It’s almost finished! Well so I’m told. The John Michael Kohler arts center has teamed up with Nourish to create this amazing mobile car/truck/bus!  The creative minds behind this adventure are connecting the community through food and arts.  They will be using the truck to preform demonstrations on healthy eating, and help educate the public.  The big premiere will be at this weekends Mid Summer Festival of the Arts, this Saturday & Sunday, July 19th and 20th.  This festival features tons of local artists, workshops and live music throughout the day.

Vegpod has the honor of giving a food demo on board this magical bus at 3pm on Saturday.  Come hang out after the farmers market.  I will be walking through steps of those Raw stuffed tomatoes everyone loves, and giving out samples and the recipe.  Yahoo for community!

Banana Bread

20140611-094828-35308751.jpg

Sheboygan Wisconsin is cold and rainy.  Its June, and I’m wearing socks.  I never wear socks, so it must be cold.  Aside from Zucchini bread, I like to make most of my other loaf breads in the fall.  The colder weather slowly trickles inside, and the warmth of running the oven for over an hour with the smells only seems fit for that time of year.

The fresh zucchini of the season won’t be around for another month, and my over ripe bananas needed to be used somehow.  Thus, Banana Bread.  Just hearing those two words makes me feel all warm and fuzzy.

20140611-094826-35306816.jpg

Bananas have high levels of tryptophan, that stuff then turns into serotonin, which keeps your brain happy and keeps you more alert.  They are the most popular fruit in the US.  Did you know that the bananas we eat today are different from those 20 years ago?  I have heard that the strain of bananas we most commonly use, currently called the cavendish, is going extinct! But no need to stress.  Chances are our grandparents were eating a different type of banana, and we never even noticed the switch.

Banana Bread

Ingredients

  • 1/4 cup almond milk
  • 1 teaspoon apple cider vinegar
  • 2 cups spelt flour
  • 1/2 teaspoon baking soda
  • 1 teaspoon cinnamon
  • 1/4 teaspoon allspice
  • 1/2 teaspoon salt
  • 1 cup turbinado sugar
  • 1/2 cup earth balance, at room temp
  • 3 very ripe bananas, mashed well, but still a little chunky
  • 1 teaspoon vanilla
  • 1/2 cup chocolate chips
  • 1/2 cup walnuts

Instructions

  1. Preheat oven to 350 F.
  2. Spray a 8×4 bread pan with non stick cooking spray.
  3. Mix almond milk with apple cider vinegar and set aside to curdle.
  4. In one bowl, sift together the flour, baking soda, and spices. Set aside
  5. In mixer, cream sugar and earth balance till light and fluffy. Mix in mashed bananas, almond milk, and vanilla.
  6. Gently stir in flour mixture to banana mixture.
  7. Fold in chocolate chips and walnuts.
  8. Pour into loaf pan and bake for 1 hour.
  9. Allow to slightly cool before removing from pan.
http://vegpod.com/banana-bread/


Around here, when we can’t find friends to help us finish the loaf within the first day, we will warm up a slice with some melted earth balance or coconut oil for breakfast.  Enjoy!

20140611-094831-35311119.jpg

Raw Nut Mylk


Zemanta Related Posts Thumbnail

As a mostly full time, stay at home mom, the perks of making all of my own food seems endless.  I don’t just mean making breakfast, lunch, and dinner.  I’m talking about making my own ingredients.

I suppose before the new family addition, it was difficult to see how I would find the time to manifest doing anything.  And of course some days it still is (like this blog for example!)  But as Oliver’s duration of sleep at night gets a little longer, and the naps are plentiful, I am happily enjoying the time I have to stray away from the ‘processed’ food we were eating.

I’d like to think that my diet is as healthy as it can be.  I eat an entirely plant based diet, mostly organic, full of whole grains and legumes.  But there were a couple things hanging over my head that I knew could be eliminated.  For example, why was I not making my own almond milk?  I had already dived into making my own yogurt, and vegan-naise, so why still buy the processed nut milks?  Once my lovely vitamix came into my life, I had no excuse.

So here goes:  My raw almond mylk recipe (plain, chocolate, and strawberry versions as well!)

Raw Nut Mylk

Ingredients

  • 1 cup raw almonds, or any other nut
  • 4 cups cold filtered water
  • 1 Tbl. agave (optional)
  • pinch celtic salt
  • 1/2 tea. vanilla
  • To make chocolate or strawberry mylk, you will need 2-3 Tbl. raw cacao, or 4 frozen strawberries)

Instructions

  1. Soak raw almonds in warm water with a pinch of salt for at least 6 hours.
  2. Drain water, then rinse.
  3. Place almonds and filtered water in blender. Turn on high for about 2 minutes.
  4. Using a nut milk bag, place bag over a large bowl or carafe. Pour in almond mylk.
  5. Gently twist the top of bag (so not to lose any!) and start to work out the liquid leaving behind the nut pulp.
  6. Return mylk back to the blender and add remaining ingredients (Add cacao or strawberries here.)
  7. Blend on low just to incorporate, unless you are adding in the frozen strawberies- then blend on high.
http://vegpod.com/raw-mylks/


Simple.  If you have a toddler hanging around, this is a terrific recipe to let them help.  Lailah, my 3 year old roommate, loves dancing and counting with me as we wait for the almonds to blend.  She also enjoys “milking” the almonds, and being the first to chug some  of the finished product, making sure we made it correctly.  So fun!

photo

You also don’t need to discard the pulp!  I keep it in a mason jar in the fridge and stir a couple spoonfuls into my steel cut oatmeal in the mornings.  Protein boost!

Long ago I gave up soy milk, and switched to only buying soy products that were free of GMO’s and organic.  But as of a week ago, I gave up soy.  As a tofu scramble loving vegan, it was a hard thing to do!  And I’ve started to realize how much soy plays the partner to corn.  Soy lecithin is such a sneaky ingredient! Next on my list will be attempts at a vegan butter.  I’m so thankful earth balance has a soy free butter.

photo 2

DIY Laundry Detergent

afterlight (1)I never in a million years would have thought l’d like to be the stay at home kind of girl.  But with the little vegan bun so close to arriving (!), I find myself ‘nesting’, with so many DIY projects on my list!

Becoming domestic is always something I’ve wanted to explore more.  Though its hard with the everyday work schedule.  Now with just one week of work left, I have time to dive in.  First on my list was making my own laundry detergent.  Wait, let me be honest;  first on my list, for years, has been to make my own dog food.  And that will come in time, as my excuse of now is needing more storage space.  So laundry detergent…. a totally simple-money saving task that would prove to be easy as pie to work into anyone’s lifestyle.  I have had a couple friends that have been doing this for so long, with far busier schedules than me, so I knew I had no excuse.  And along with the cloth diapers about to start rolling in daily, I knew this was the time.  Method adapted from Wellness Mama!

Materials / Ingredients

  • BoraxA natural laundry booster that lifts stains and odors from your clothes.  You can find this at just about any grocery store.  
  • Washing SodaA natural water softener and stain remover.  Also found in the detergent aisle at many grocery stores.
  • Bar SoapI prefer to use an all natural, less perfume-y style soap.  Dr. Bronners makes bar soaps, and if whole foods happens to have a sale going on- even better.
  • Container – You will need something to store the detergent in, preferably something that has a large opening, so you can easily use your scoop. 
  • Cheese GraterYour standard, handheld grater.
  • 1/4 cup scoop Any measuring cup will do!

Now to start:

In a large bowl, using cheese grater, shred the bar soap.  I use the medium sized teeth.  Once you have finished, mix in 2 cups borax, and 2 cups washing soda.  The proportions should be 1 cup bar soap, 2 cups borax, and 2 cups washing soda.  Gently stir together till fully incorporated.  Make sure you get to see little specs of your bar soap squiggles throughout the batch!  Transfer to your storing container.

And Voila!  You just made Laundry Detergent!
To use:  1/8 of a cup for smaller loads, and 1/4 cup for large loads.

Our first trial run just happened to be the day Erik brought all of his soccer clothes home.  And boy were they stinky!  The detergent proved to work!  I am still accessing my math on how mush this will save us, but I think it cuts the price in half (possibly more) of what we’d spend on liquid detergent.  Not to mention we cut back on contributing more to the plastic take over of the world.  This article was posted last week about plastic in our oceans, and the effects it has on whales, and various animals around the globe.

http://www.youtube.com/watch?v=ulkY7mOkdqs

Caramel Sea Salt Chocolate Cups

afterlight

Blame it on fall, but I am loving the dates surrounding me lately.  I often think figs are my favorite fruit.  Figs have such a great texture, and are not too sweet.  I used to love eating them fresh off the trees in San Diego.  They are just so beautifully unique.

As far as dates go, they taste like nature’s caramel.  Creamy, rich in dietary fiber, potassium, and Manganese (Manganese is good for your bones, anemia, and premenstrual  symptoms) dates can be used in so many different ways.  Smoothies, salads, oatmeal, savory dishes, brownies, or just as is.  I’ve been using them to sweeten my 2 minute hemp mylk…recipe to come soon.

photo (2)

Dates!  And yes, that is a huge Kohlrabi in the background!

There are endless varieties of dates grown in the Middle East, but from California the two most common are the Medjool and Deglet.  My roommates just brought back a bag of plump Medjool dates from this great little place called Sun and Earth.  I have yet to venture there, but they sell an assortment of bulk organic herbs, spices, and other random organic grocer products.  The dates they brought back are out of this world!  Its like they reached their peak of plumpness as they entered our kitchen, and hadn’t dried out too much where you’d want to re-hydrate them.  They are just perfect.

With all this date hype, I wanted to share a recipe I used for Erik’s birthday.  My husband doesn’t like cake, he’s not big on pie, so I opted to try for Caramel sea salted chocolate cups…. no biggie  🙂

Caramel Sea Salt Chocolate Cups

Ingredients

  • For the caramel filling:

  • 2 cups pitted dates, soaked for at least 2 hours. Save date water...see below 🙂
  • 1/4 cup soaked date water
  • 1.5 tsp vanilla extract
  • 1/2 tsp sea salt

  • For the chocolate:

  • 3/4 cup vegan chocolate chips
  • 1 Tbl almond milk
  • 1 tsp virgin coconut oil

Instructions

    For the Chocolate:
  1. Melt chocolate chips in a small heavy bottomed sauce pan.
  2. Stir in coconut oil, and almond milk. You may want to use a small whisk to help make sure the coconut oil is well mixed in.
  3. Line about 15 mini cups with melted chocolate, bottom layer!
  4. Place in fridge.
  5. For the Caramel:
  6. Drain soaked dates, but save the date water!
  7. Place all ingredients in a food processor. Blend until smooth, thick, and creamy. Using a spatula, scrape down the sides as necessary, making sure all gets incorporated.
  8. Set aside.
  9. To assemble:
  10. After bottom layer of chocolate has firmed up in fridge, layer with a caramel dollop, then top off with more melted chocolate mixture. Garnish with cacao nibs, and some course salt flakes.
  11. Place back into fridge to solidify. They should be ready to eat in 15 minutes.
http://vegpod.com/caramel-sea-salt-chocolate-cups/

Some side notes:
I was a little concerned that the melted chocolate wouldn’t surround the ‘caramel’, so I added more than I should have.  Not that I’m complaining, I mean ANY amount of chocolate is fine by me.  But because of this, they did turn out a tad rich.

I also ended up with some of the date-caramel sauce leftover, which was great to eat with fresh apple slices!  Or a spoon.  That stuff is amazing, and definitely a danger to have just lying around the kitchen.

photo 2

The first layer of chocolate goes in… did I mention that should you happen to make a mess, this is the best finger licking recipe to have that happen?!

photo 3

The caramel layer.  

afterlight

Happy 30th Erik!  This is definitely a big boy dessert!  Who needs cake anyway?!

Birdie Granola aka ‘Nola’

photo (23) Its been almost 2 months ago since we left Wisconsin.  And as much as I do miss it, I am whole heartedly enjoying Annapolis, Maryland.  What a great city.  A charming brick laid downtown, overly dog friendly, bike friendly, and I love living in a city that thrives off of the water.  And have I mentioned yet how nice it is to be able to smell the salt water!  Its lovely. Back in Sheboygan, we were making a plethora of granola bi-weekly.  Vegpod sold two flavors at the farmers market, and two flavors to Goodside Grocery for resale.  It always had a tendency to sell like crazy, and we never ran out at the house.  Win-win.  Annapolis is proving to be similar.  Though we are not wholesaling anywhere, and though we don’t run a booth here, we do live with the cutest two-and-three-quarter-year old, who loves to eat granola, or ‘nola’ as she calls it.  Lailah like to eat her nola just as is with a spoon, or out of her hand.  How kid friendly is that? photo (22) The other great things about this granola is that its super easy to make.  And homemade always tastes better anyway, so why out source?  Thats no reason to stop buying Vegpod’s granola, but I encourage everyone to try it out!  I promise you will feel amazing and your kitchen will smell fabulous for hours!  Did I mention its gluten free as well?

Birdie Granola

Ingredients

  • 3 cups old-fashioned oats
  • 3/4 cup quinoa flour (scoop and shake to level)
  • 3/4 cup sunflower seeds
  • 1 cup chopped pecans, walnuts, or any kind of nut
  • 2/3 cup sesame seeds
  • 1 tea. pinch sea salt
  • 2 tea. cinnamon
  • 1 tea. nutmeg
  • 1/4 cup safflower oil
  • 2/3 cup maple syrup (the good stuff) or agave nectar
  • 1.5 tea. vanilla extract
  • 1/2 cup raisins, cranberries or any other chopped dried fruit

Instructions

  1. Preheat oven to 300 degrees. Mix first set of ingredients together in large bowl.
  2. Then mix second set of ingredients in separate bowl.
  3. Pour wet into dry ingredients, combine until well coated. spread evenly on the baking sheet.
  4. Bake for 10 minutes, stir. bake for another 10 minutes, keeping a close eye on the stuff, both agave & maple syrup can brown quick!
  5. Remove from oven, stirring again.
  6. Once its cool, stir in the dried fruit.
http://vegpod.com/birdie-granola-aka-nola/

There you have it!  I told you it was easy.  You don’t have to be precise with any of the nuts or fruits, really anything to your liking will work.  Sometimes I like to stir in toasted coconut, then sometimes cherries are great for a little tartness.  You can be like Lailah and eat it as is, or have it over your favorite yogurt or milk with some berries.  I have been obsessed with the Trader Joe’s brand soy yogurt, but they have been out of stock for months!  Such a bummer.  Since then I’ve opted for the so-delicious coconut milk based yogurt.  Its not bad, but nothing compared to Trader Joe’s.  Once the weather cools, I will pull out the dehydrator and start making my own again.  Oh fall, how I am ready for you!

photo (21)